In numerous New Zealand gardens, hydrangeas are a popular choice due to their lavish foliage and magnificent blooms. However, for these plants to thrive as they should, it is crucial to comprehend the correct techniques for pruning them. This article thoroughly explores when and how one must prune hydrangeas in New Zealand by highlighting ideal seasonal timing and methods that can facilitate healthy growth along with profuse flowering.
Why Pruning Hydrangeas in NZ is Essential
Pruning your hydrangeas in NZ is not solely for the purpose of keeping your garden looking neat and tidy. Rather, it plays a vital role in improving their overall health and lifespan. The following are the key reasons why pruning should be considered an essential practice:
Encourages New Growth
Pruning hydrangeas in New Zealand serves as a catalyst for encouraging fresh growth, which is vital for the plant’s overall vigor and bloom production. Here’s how pruning facilitates new growth:
- Removal of Old Growth: By selectively pruning away old, spent stems and flowers, you create space and resources for new shoots to emerge.
- Stimulates Buds: Pruning triggers dormant buds along the stems to break dormancy and produce new growth, resulting in a bushier, more robust plant.
- Promotes Vigorous Stems: New growth stimulated by pruning tends to be more vigorous, leading to larger, more vibrant flowers in the subsequent blooming season.
Improves Plant Health
Pruning is not only about aesthetics; it’s also crucial for maintaining the overall health and vitality of hydrangea plants. Here’s how pruning contributes to plant health:
- Removal of Diseased Wood: Pruning allows you to identify and remove any dead, diseased, or damaged wood, reducing the risk of infection and disease spread.
- Minimizes Pest Infestations: Dead or weakened branches can attract pests and serve as breeding grounds for harmful insects. Pruning helps eliminate these potential habitats, reducing the likelihood of pest infestations.
- Enhances Air Circulation: Thinning out dense growth through pruning improves air circulation within the plant canopy, which is essential for preventing fungal diseases such as powdery mildew and gray mold.
Shapes the Plant
Proper shaping through pruning is essential for maintaining the desired form and appearance of hydrangea plants. Here’s how pruning helps shape the plant:
- Prevents Legginess: Without regular pruning, hydrangeas can become leggy, with long, sparse stems and uneven growth. Pruning helps maintain a compact, bushy form, preventing legginess.
- Controls Size: Pruning allows you to control the size and spread of the plant, ensuring it fits within its allotted space in the garden or landscape.
- Promotes Attractive Growth Habit: By selectively removing wayward branches and shaping the plant’s structure, pruning enhances the overall aesthetic appeal of hydrangeas, making them more visually pleasing focal points in the garden.
Best Time to Prune Hydrangeas in NZ
The timing of pruning can significantly impact the health and flowering of hydrangeas. In New Zealand, the best time to prune depends on the type of hydrangea:
Mophead and Lacecap (Hydrangea macrophylla)
Mophead and lace cap hydrangeas are among the most popular varieties, cherished for their large, showy blooms and lush foliage. For these types, the best time to prune is immediately after flowering in autumn. Here’s a more detailed look at why this timing is recommended:
| Pruning Benefit | Description |
| Preservation of Flower Buds | Mophead and lacecap hydrangeas form their flower buds during the previous growing season. Pruning immediately after flowering allows gardeners to remove spent blooms and shape the plant without inadvertently removing next season’s flower buds. This preservation ensures a bountiful display of blooms in the following year. |
| Promotion of New Growth | Pruning after flowering encourages the plant to allocate its resources towards producing new growth and setting buds for the following year. By removing old, tired growth, the plant can channel its energy into generating fresh, vigorous stems, resulting in a healthier, more robust plant overall. |
| Prevention of Disruption | Pruning immediately after flowering minimizes the risk of disrupting the plant’s natural growth cycle. Waiting until autumn ensures that the plant has completed its flowering cycle and is entering a period of dormancy, making it less susceptible to stress from pruning. This timing also allows the plant to gradually transition into dormancy, preparing it for the colder months ahead. |
Paniculata and Arborescens
Paniculata and arborescent hydrangeas, known for their cone-shaped flower clusters and sturdy growth habit, require a different pruning approach due to their blooming pattern. These varieties bloom on the current year’s wood, necessitating pruning in late winter or early spring before new growth begins. Here’s a closer look at why this timing is optimal:
- Encouragement of New Growth: Paniculata and arborescent hydrangeas produce flowers on the current season’s growth. Pruning in late winter or early spring stimulates the plant to produce new, vigorous growth, which will bear flowers later in the season. By removing old, woody stems and encouraging fresh shoots, gardeners can ensure a profusion of blooms come summertime.
- Shaping and Maintenance: Pruning before new growth emerges allows gardeners to shape the plant and remove any dead or damaged wood from the previous growing season. This helps maintain the plant’s desired form and structure, promoting overall health and aesthetics. Additionally, by thinning out dense growth, gardeners can improve air circulation within the plant canopy, reducing the risk of fungal diseases.
- Optimal Timing: Late winter or early spring pruning provides ample time for the plant to recover and set buds for the upcoming blooming season. By pruning before the onset of new growth, gardeners can ensure that the plant’s energy is directed toward producing healthy shoots and abundant flowers. This timing also allows gardeners to assess the plant’s condition after winter and address any issues before the growing season begins in earnest.
How to Prune Hydrangeas in NZ
Pruning techniques may vary slightly based on the hydrangea species, but the following general steps can guide you:
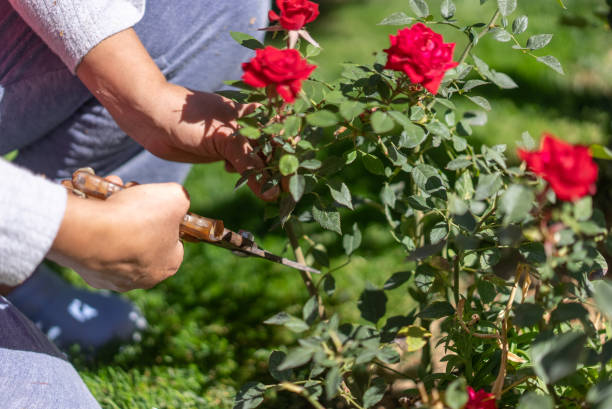
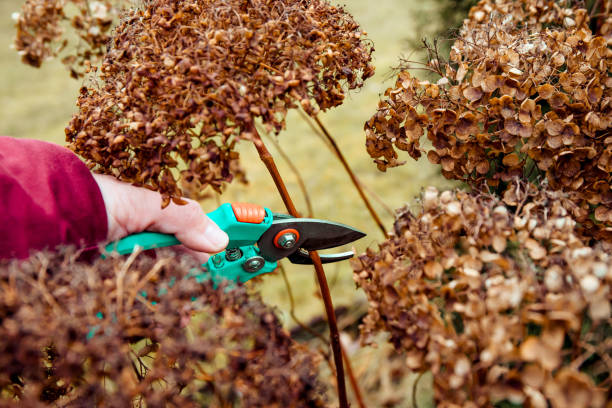
Remove Dead Wood
One of the first steps in pruning hydrangeas is to eliminate any dead or dying branches. Dead wood not only detracts from the plant’s aesthetic appeal but can also serve as a breeding ground for pests and diseases. Follow these steps to identify and remove dead wood:
- Visual Inspection: Conduct a thorough visual inspection of the hydrangea plant, paying close attention to branches that appear brown, brittle, or devoid of foliage. These are likely dead or dying and should be targeted for removal.
- Pruning Technique: Armed with sharp, clean pruning shears or loppers, make clean cuts just above the point where the dead wood meets living tissue. This ensures a smooth transition and promotes rapid healing, reducing the risk of further decay or infection.
- Dispose of Debris: Once dead wood has been removed, promptly dispose of the debris to prevent the spread of pests or diseases to other plants in the vicinity. Proper disposal methods may include composting, burning, or discarding in green waste bins.
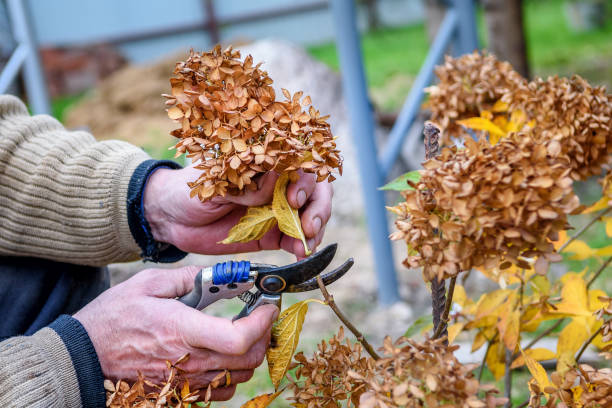
Cut Back Old Blooms
To encourage continued flowering and maintain a tidy appearance, it’s essential to trim back old blooms on hydrangea plants. Follow these steps to effectively prune spent flower heads:
- Identification of Spent Blooms: Scan the hydrangea plant for faded or withered flower heads, which are easy to spot amidst the vibrant foliage. These spent blooms detract from the plant’s overall beauty and should be promptly removed.
- Pruning Technique: Utilizing sharp pruning shears, make cuts just above the first set of large, healthy buds beneath the spent flower head. This strategic pruning technique encourages new growth and ensures a fresh flush of blooms in the upcoming season, prolonging the plant’s flowering period.
- Timing Considerations: The timing of pruning varies depending on the hydrangea species. For mophead and lace cap hydrangeas, pruning immediately after flowering in autumn is recommended to preserve next season’s flower buds. Conversely, paniculata and arborescent varieties can be pruned in late winter or early spring before new growth commences.
Shape the Plant
Maintaining the desired shape and size of the hydrangea plant is essential for aesthetic appeal and garden integration. Follow these guidelines to shape the plant to your liking:
- Assessment of Growth Habits: Take a step back and evaluate the overall shape and size of the hydrangea plant. Identify any areas where corrective pruning may be necessary to achieve the desired form and structure.
- Selective Pruning: With a discerning eye and steady hand, selectively prune up to one-third of the living stems to reduce the size of the plant or correct its shape. Focus on removing overcrowded, weak, or crossing branches to improve air circulation and promote healthy growth throughout the canopy.
- Caution Against Over-Pruning: While it’s tempting to prune heavily to achieve a specific shape or size, exercise restraint to avoid over-pruning. Excessive pruning can stress the plant and diminish its flowering potential, so aim for gradual, selective pruning over time to maintain a balanced and natural appearance.
Maintenance and Aftercare
Once pruning is complete, it’s essential to provide ongoing care and maintenance to support the health and vitality of the hydrangea plant:
- Watering: Ensure the hydrangea plant receives adequate water, especially during periods of drought or hot weather. Deep, infrequent watering is preferable to frequent, shallow watering, as it encourages deep root growth and drought tolerance.
- Fertilization: Apply a balanced fertilizer formulated for flowering shrubs according to package instructions to provide essential nutrients for robust growth and prolific flowering. Avoid excessive nitrogen, as it can promote lush foliage at the expense of blooms.
- Mulching: Apply a layer of organic mulch, such as shredded bark or compost, around the base of the hydrangea plant to conserve moisture, suppress weeds, and regulate soil temperature. Mulching also improves soil structure and provides a gradual release of nutrients as it decomposes.
- Monitoring for Pests and Diseases: Regularly inspect the hydrangea plant for signs of pests, such as aphids or spider mites, and diseases, such as powdery mildew or leaf spot. Early detection allows for prompt intervention, minimizing damage and ensuring the plant’s continued health and vigor.
Hydrangea Cuttings NZ
Propagating hydrangeas through cuttings is a rewarding way to expand your garden. Here’s a simple guide to taking hydrangea cuttings in New Zealand:
Timing
Taking hydrangea cuttings in New Zealand is most successful during spring when the plant’s growth is at its peak. This timing ensures:
- Vigorous growth: Spring provides optimal conditions for active growth, increasing the likelihood of successful root development.
- Favorable climate: Warmer temperatures and increased daylight hours promote root formation and overall plant health.
Cutting Selection
When selecting cuttings for propagation, follow these guidelines:
- Healthy stems: Choose stems that are free from damage, disease, or pest infestation to ensure the best chances of success.
- Non-flowering: Select stems that have not yet flowered, as they are more likely to root successfully and establish new plants.
- New growth: Look for stems with fresh, green growth, as these are more likely to produce roots quickly and thrive in their new environment.
Preparation
Prepare the cuttings for planting with the following steps:
- Remove lower leaves: Strip the lower leaves from the stem to reduce moisture loss and prevent rotting.
- Use rooting hormone: Dip the cut end of the stem into rooting hormone powder to stimulate root growth and increase propagation success rates.
- Ensure proper cutting length: Cut a segment of the stem approximately 15 cm long, making the cut just below a leaf node to encourage root formation.
Planting
Plant the prepared cuttings with care:
- Choose a suitable potting mix: Use a well-draining mix of perlite and peat moss to provide optimal conditions for root development.
- Insert the cutting: Insert the prepared cutting into the soil, burying at least one leaf node beneath the surface for stability.
- Watering: Keep the soil consistently moist but not waterlogged to prevent rotting and promote healthy root growth.
Care and Maintenance
Provide proper care and maintenance to ensure the success of your cuttings:
- Placement: Place the pot in a warm, shaded area with indirect sunlight to encourage root development and prevent wilting.
- Monitor moisture levels: Check the soil regularly and water as needed to maintain consistent moisture levels without overwatering.
- Create a mini greenhouse: Cover the pot with a clear plastic bag or dome to create a humid environment and retain moisture around the cutting.
Monitoring and Root Development
Monitor the progress of your cuttings:
- Regular inspection: Check the cuttings regularly for signs of root development, such as new growth or resistance when gently tugged. Look for white, fleshy roots emerging from the cut end of the stem, indicating successful root initiation and establishment.
- Patience: Root development can take several weeks, so be patient and allow sufficient time for the process to occur naturally. Avoid disturbing the cutting unnecessarily, as this can disrupt root growth and delay establishment. Continue to provide consistent care and monitor environmental conditions to optimize rooting success.
Transplanting
Once roots have formed and the cutting has established itself, it’s time to transplant:
- Choose a suitable location: Select a location with well-drained soil and partial shade to protect the young plant from harsh sun exposure. Hydrangeas prefer slightly acidic soil with good organic content, so amend the planting site as needed to create optimal growing conditions.
- Watering: Water the newly transplanted cutting thoroughly to help it settle into its new environment and promote further growth. Apply a slow-release fertilizer formulated for flowering shrubs to provide essential nutrients and support healthy growth. Mulch around the base of the plant to conserve soil moisture and suppress weed growth.
Conclusion
Understanding when and how to prune hydrangeas in NZ is key to cultivating a vibrant and healthy garden. By following the guidelines laid out in this article, you can ensure your hydrangeas thrive, bringing color and life to your garden throughout the growing season. Remember, regular pruning not only enhances the beauty of your hydrangeas but also their overall health and longevity.
FAQ
The ideal time to prune hydrangeas in NZ varies by type. For Mophead and Lacecap hydrangeas, prune in autumn after flowering. For Paniculata and Arborescens, late winter or early spring is best.
Hydrangeas benefit from annual pruning to remove dead wood and encourage new growth. If your hydrangea is overgrown or hasn’t been pruned in a few years, it’s likely time to prune.
For Paniculata and Arborescens hydrangeas, winter pruning is appropriate as they flower on new wood. However, Mophead and Lacecap hydrangeas should not be pruned in winter, as this can remove flower buds.